How to Replace a Waterproof Micro Switch in Automotive Step by Step
Waterproof micro switches are widely used in various control systems of new energy vehicles, including seat adjustment, door locks, headlights, and electronic parking brakes. They are specifically designed to withstand the challenges of humidity, temperature variations, and vibrations in the vehicle's internal and external environment, ensuring the normal operation of the vehicle systems. Due to their core role in safety, functionality, and vehicle lifespan, they have become an indispensable component in new energy vehicles.
However, waterproof micro switches can also malfunction, causing certain vehicle systems to fail, affecting the driving experience and even safety. When these switches malfunction, they must be replaced promptly. Therefore, understanding how to correctly replace waterproof micro switches is crucial for car owners and repair personnel. This article will also detail how to replace waterproof micro switches step-by-step based on fault diagnosis.
What is a Waterproof Micro Switch in Automotive Systems?
Basic Concepts of Waterproof Micro switches
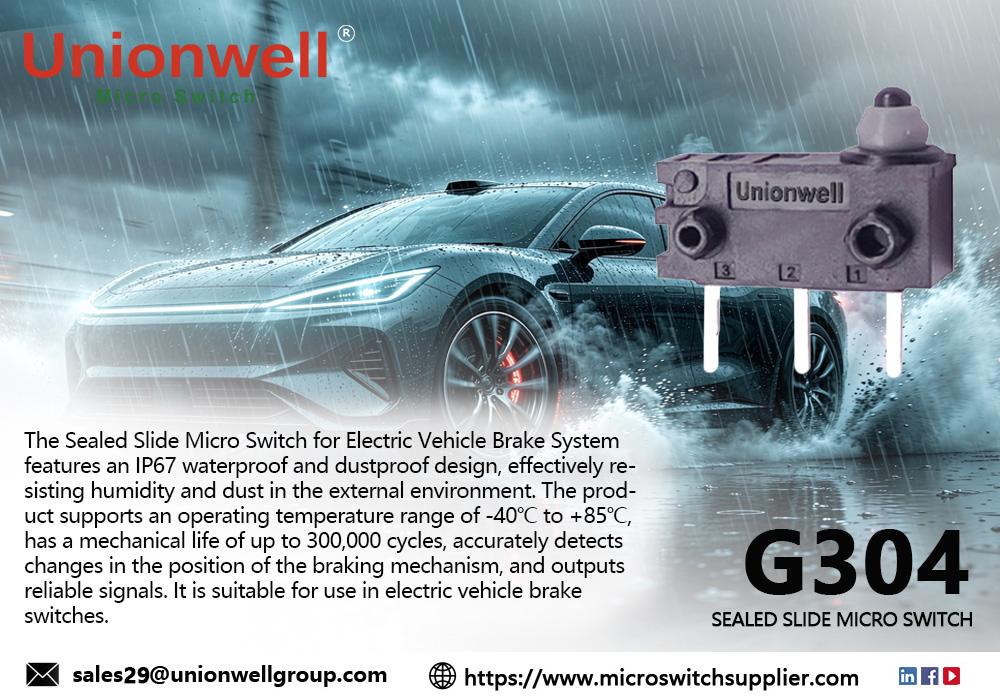
A waterproof micro switch is a widely used switch in automotive electrical systems. It triggers internal contacts through mechanical action, thereby providing a switching signal to the control system. Waterproof micro switches are typically designed with a sealed housing to prevent moisture, dust, and other contaminants from entering, ensuring their reliability in harsh environments. These switches are commonly used in control systems, such as car doors, seat adjustments, and electronic parking brakes, and can operate stably for extended periods in environments with moisture, humidity, or high temperatures.
The Necessity of Waterproof Design
Cars are likely to frequently encounter rainy, humid, or high-temperature environments; therefore, the micro switches installed within them also need to be waterproof. For example, components such as car doors and seat adjustment systems are often exposed to moisture and dirt, and these environmental factors can affect the function of the switches. Waterproof design can effectively extend the lifespan of the switches and ensure the stability of the vehicle control system.
Common Applications of Waterproof Micro switches
Waterproof micro switches have a wide range of applications in automobiles, including but not limited to:
- Door lock control micro switches: Ensure normal door opening and closing and instantly detect door status.
- Seat adjustment micro switches: Control seat adjustment and locking functions.
- Charging gun electronic lock switches: Ensure the working status of the charging gun and promptly determine whether to lock.
Signs That the Waterproof Micro Switch Needs Replacing
Common Fault Symptoms
Waterproof micro switches are prone to various faults during automotive use. Common symptoms include:
- Button Unresponsive: The switch does not respond after pressing the button, or its response is sluggish.
- Poor Contact: The switch response is noticeably delayed, or the fault occurs intermittently or even frequently.
- Signal Transmission Delay: After the switch is activated, the control system fails to respond promptly, leading to malfunction.
- Unstable Electrical Output: Severe signal fluctuations prevent the vehicle control system from diagnosing the abnormality.
How to Diagnose Waterproof Micro Switch Faults
If a waterproof micro switch fault is suspected, we can perform a preliminary diagnosis using the following steps:
- Use a multimeter: Test the switch's current and voltage to check if it can correctly transmit electrical signals.
- Visual Inspection: Inspect the switch housing for damage, corrosion, or other physical damage.
- Inspect the Contact Points: With knowledge of the internal structure, disassemble the micro switch and observe whether the contacts are clean, contaminated, or corroded.
Impact of the Fault
If a faulty waterproof micro switch is not replaced promptly, it may cause system malfunctions and even pose a significant threat to traffic safety. For example, door locks may fail to close properly, seat adjustments may malfunction, or the seat belt reminder light may not illuminate correctly, all of which could potentially affect driving safety.
Step-by-Step Guide to Replacing a Waterproof Micro Switch
So, knowing that the car's micro switch is likely faulty, how do we replace it?
Preparation and Safety Precautions
Before replacing the waterproof micro switch, ensure you have the following tools and equipment: a screwdriver, a multimeter, waterproof lubricant, and a new waterproof micro switch (ensure it is the same model as the original and has an appropriate waterproof rating, such as IP67).

Before performing any operations, ensure the vehicle's power is disconnected to avoid the risk of electric shock or electrical malfunction. Safety is the primary consideration when replacing a waterproof micro switch.
Step 1: Locating and Removing the Faulty Waterproof Micro Switch
Locate the faulty switch: Locate the faulty waterproof micro switch according to the vehicle manual or the actual situation. Common locations include the door, seat adjustment, and electronic parking brake.
Remove the switch: Carefully remove the switch using a screwdriver, avoiding damage to surrounding components.
Step 2: Pre-installation Inspection of the New Waterproof Micro switch
Before installing the new waterproof micro switch, the following points must be checked:
- Model Consistency: Confirm that the new switch model matches the old switch to avoid any issues caused by model differences.
- Waterproof Rating Check: Ensure the new switch has a suitable waterproof rating, such as IP67, suitable for automotive environments.
- Contact Stability: Ensure the new switch contacts operate stably to prevent system malfunctions due to poor contacts.
Step 3: Installing the New Waterproof Micro switch
- Connecting Electrical Connectors: Connect the new switch's electrical connectors to the control system according to the vehicle's wiring diagram.
- Secure the Switch: Ensure the new switch is correctly positioned, then use a screwdriver or other tools to secure it firmly to prevent unstable contacts due to improper installation.
- Adjustment: Ensure the switch is correctly aligned and tightened before reinstalling other external components to ensure accurate triggering when needed.
Step 4: Testing and Confirming Operation
- Connecting Power and Testing: Reconnect the power supply to confirm the new waterproof micro switch functions correctly.
- Use a multimeter to check the electrical output: confirm that the new switch can output signals correctly and respond to the control system in a timely manner.
Troubleshooting Common Problems When Replacing a Waterproof Micro Switch
Common Problems and Solutions
- Poor Contact: Possible causes include unstable wiring or improper installation. The solution is to reconnect the electrical connectors and ensure stable contact.
- Unstable Signal: Check that the contacts are clean. Clean the contacts if necessary and ensure they are free of contamination.
- Improper Installation: Ensure the new switch is fully installed and check that it is secure.
Troubleshooting Installation Issues
If you encounter any problems during installation, refer to the following tips:
- Use Lubricant: Ensure the waterproof micro switch maintains its seal and flexibility.
- Ensure Secure Electrical Connections: Prevent signal loss or malfunction due to poor contact.
Conclusion
Waterproof micro switches are an indispensable core component in modern automobiles, ensuring the stability and safety of various vehicle control systems. Timely replacement of faulty waterproof micro switches helps ensure the normal operation of automotive systems.
This article details the replacement steps for waterproof micro switches carefully provided by the micro switch manufacturer and summarizes common problems and solutions. Regular inspection and maintenance of waterproof micro switches are key to ensuring the long-term reliable operation of automobiles.
A Technical History of the DPDT Micro Switch
The Role of an Air Pressure Switch in Modern Water Heater
Related Article